|

|
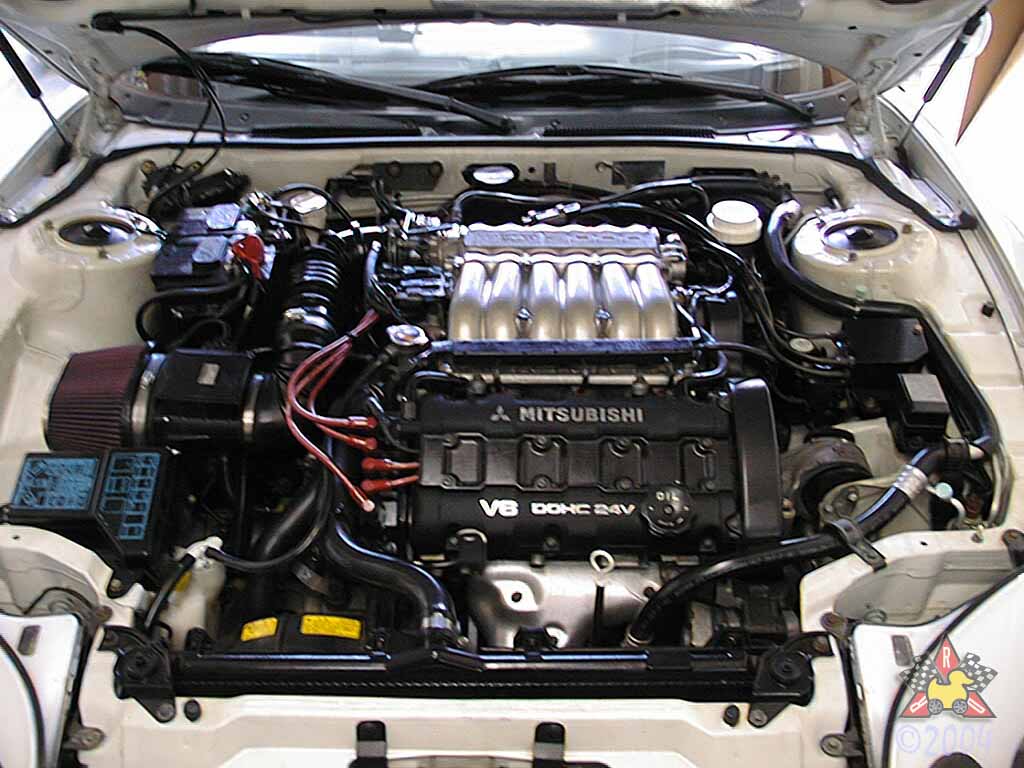
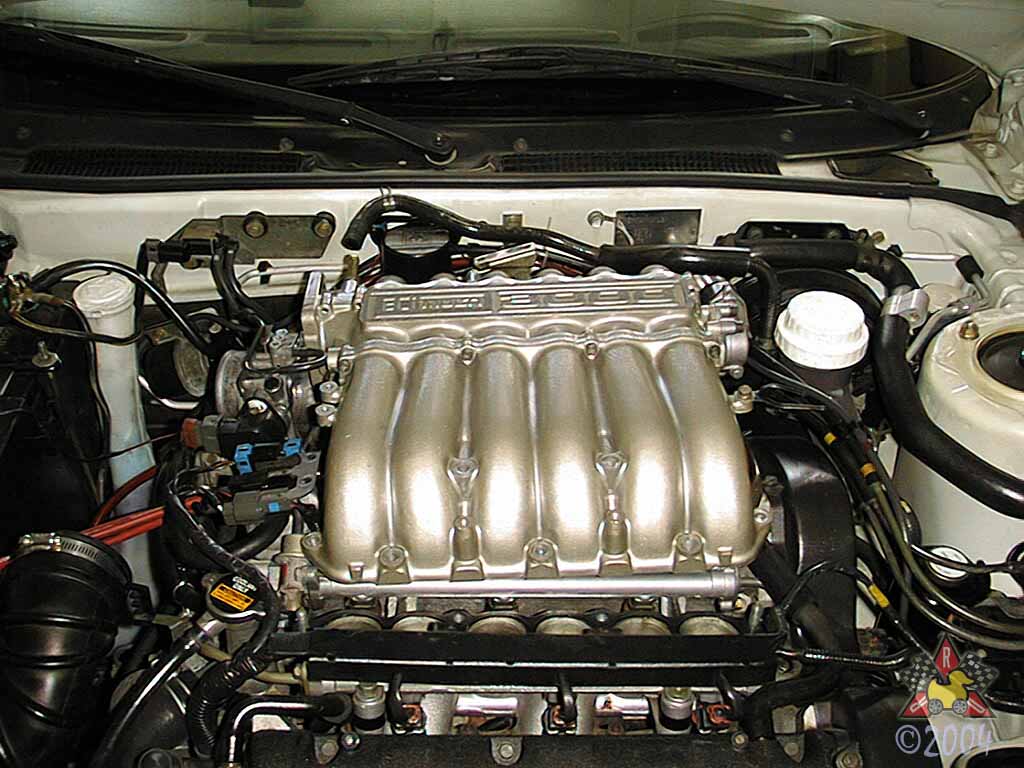
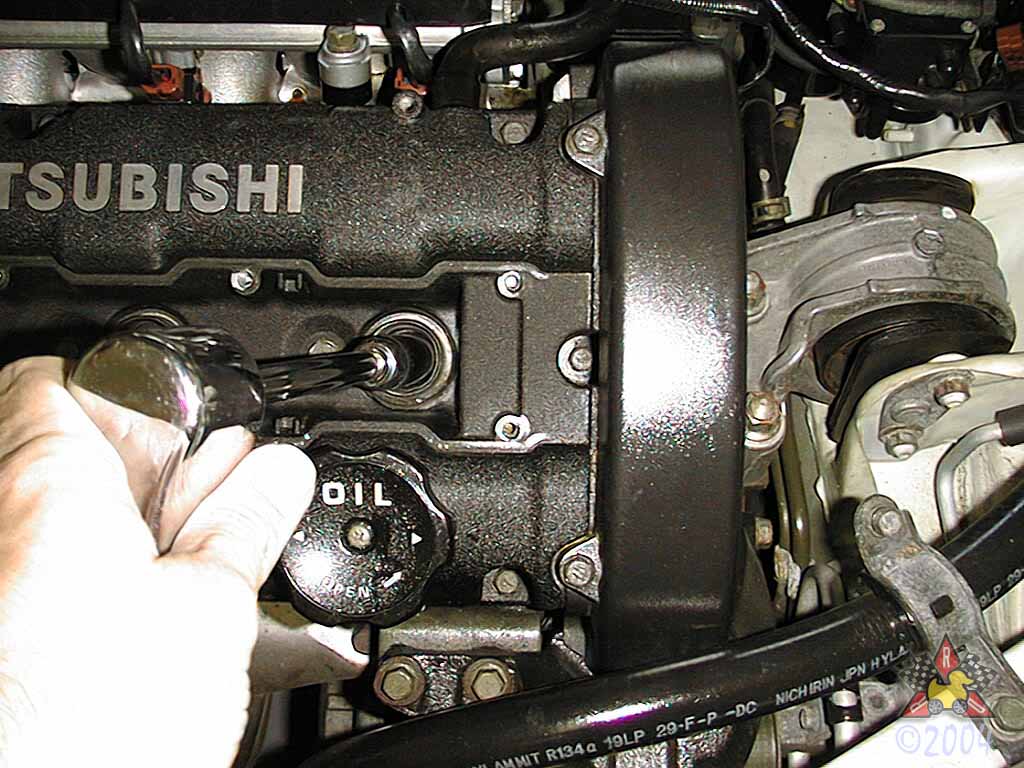
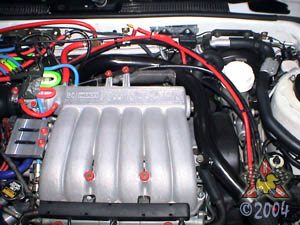
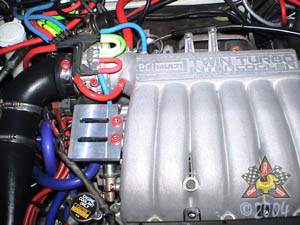
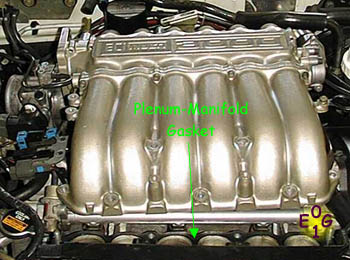
Remove Center Cover from Front Bank Valve cover
|
|
|
|
|
|
This plastic plate is held in by the 8 bolts at its edges and covers
the front spark plug wires/wells. Use either a large Phillips screwdriver
or a 10mm socket. Picture shown with plate removed.
|
|
|
|
Remove the Accelerator Cable Bracket
|
|
|
|
|
|
Two 10mm bolts (5 N*m) hold the accelerator cable to the rear
of the intake plenum. Remove the bolts and pull the bracket
away from the plenum. Leave the accelerator cable attached to
the throttle body. Note when reinstalling the bracket,
adjust the bracket position so that there is minimal play in the
cable, but be sure that the throttle plate is completely closed
when you are not pulling on the cable! You can also check out
the Throttle Cable Adjustment
page for more information.
Non-Turbo shown above; Turbo shown below.
|
|
|
|
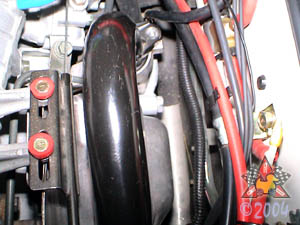
Remove Rear Turbo Compressor Outlet Pipe [Turbo Models Only]
|
|
|
|
|
|
There is a single 12mm bolt that holds the black outlet pipe to the
compressor housing. Remove the bolt. There is also a 12mm bolt that
secures the pipe to the plenum. It's about halfway down the pipe on top
of the plenum - remove this bolt, too. Finally, you need to loosen the hose
clamp on the hose that attaches to the other end of the pipe. At this point,
the pipe is free and you should be able to remove it.
|
|
|
|
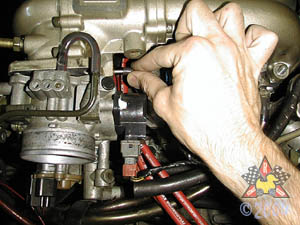
Remove Wiring Harnesses from Left Side of Intake Plenum
|
|
|
|
|
|
Two 10mm bolts hold the bracket to the left side of the intake plenum.
Remove the bolts and push the connectors away from the plenum. It is
not necessary to unplug the connectors. Note that the OEM FWD (Non-Turbo)
setup is shown on the left and the Turbo setup (with
ek2Development
cover plate) is shown on the right.
|
|
|
|
Remove the Front Wiring Harness Rail
|
|
|
|
|
|
Two 10mm bolts hold the wiring rail to the front of the intake plenum.
Remove the bolts and pull the rail away from the plenum.
Again, note that the OEM FWD (Non-Turbo)
setup is shown on the left and the OEM Turbo setup
is shown on the right.
|
|
|
|
Disconnect Clutch Booster Vacuum Hose [Turbo Models Only]
|
|
|
|
|
|
Remove the clamp by pinching it and sliding it off of the hose.
Then the pull the hose off of the nipple on the plenum.
|
|
|
|
Disconnect the PCV Hose [Non-Turbo Only]
|
|
|
|
|
|
Remove the Positive Crankcase Ventilation (PCV) Hose from the
intake pipe. If it is stuck, twist the end near the intake pipe
carefully before pulling it off.
|
|
|
|
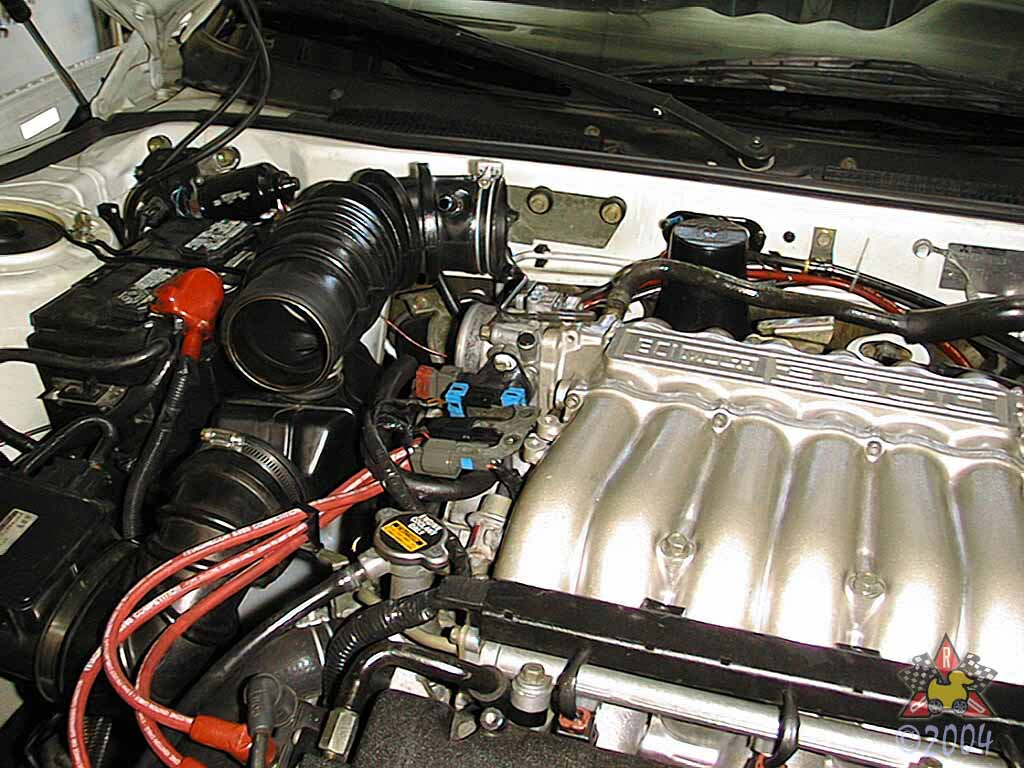
Disconnect the Intake Pipe
|
|
|
|
|
|
- Loosen the two hose clamps at the ends of the intake pipe. The
Turbo models have two hoses to disconnect at the end toward the
front of the car.
- Disconnect both ends of the intake pipe and lift it out of the
engine bay. The fittings are pretty tight, so you may have to
wiggle it a bit to get it loose
Note: Non-turbo shown above, Turbo shown below.
|
|
|
|
Remove Intake Pipe
|
|
|
|
|
|
Now that the pipe is disconnected, remove it from the engine bay.
|
|
|
|
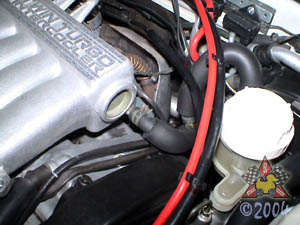
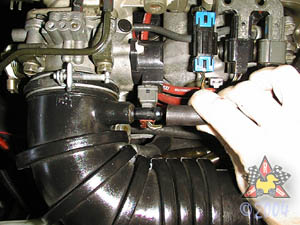
Disconnect Brake Booster Hose
|
|
|
|
|
|
Remove the brake booster vacuum hose by pinching the clamp to
loosen it and then slide the hose off the nipple on the plenum.
|
|
|
|
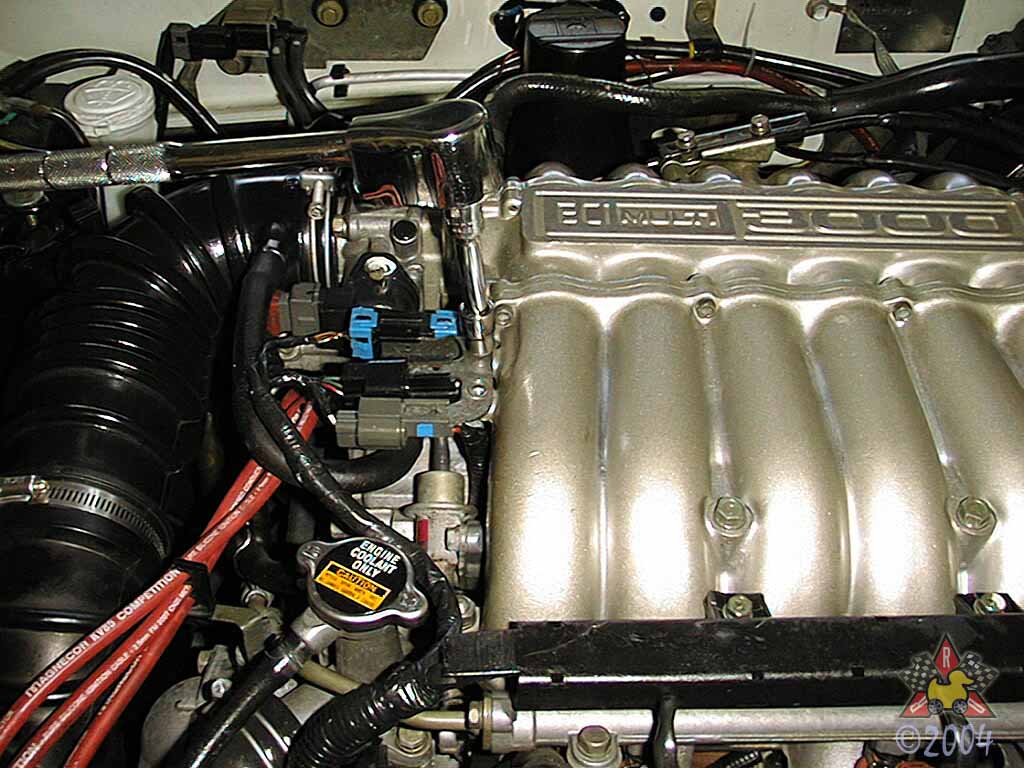
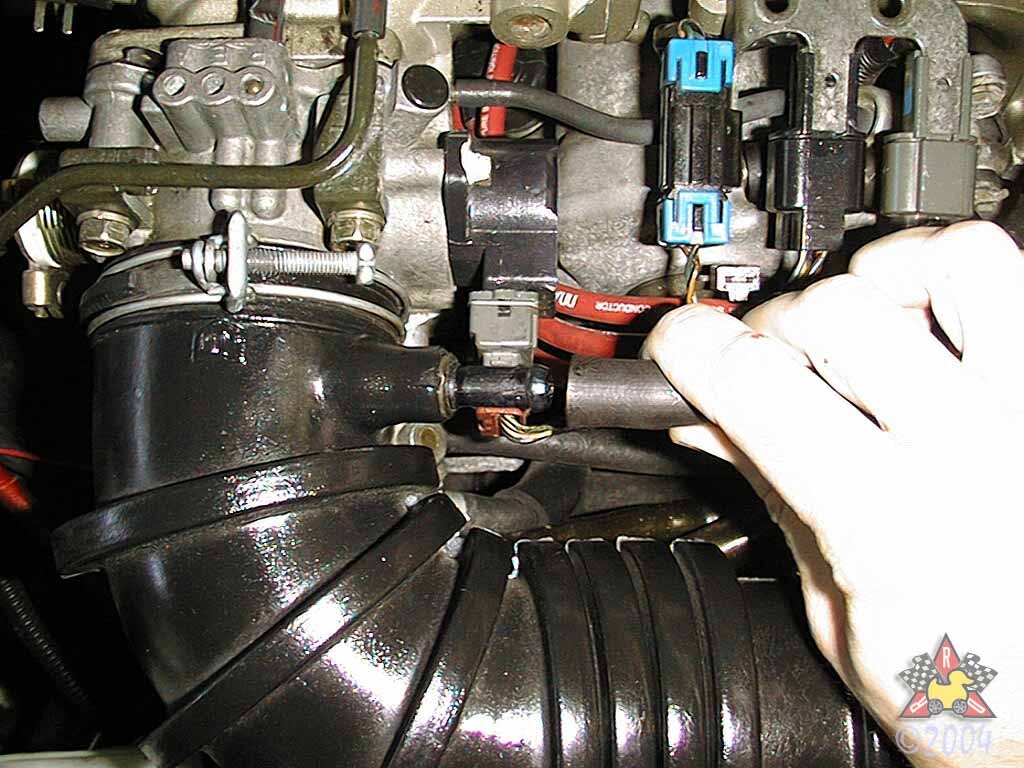
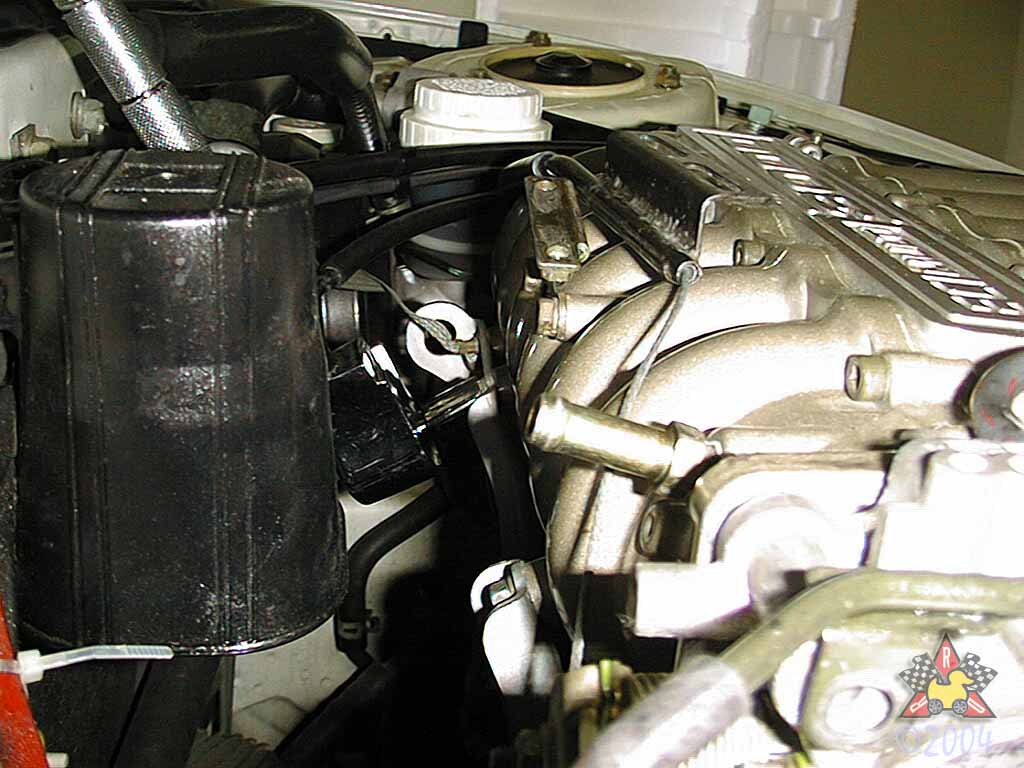
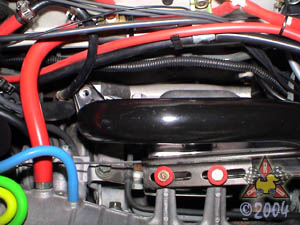
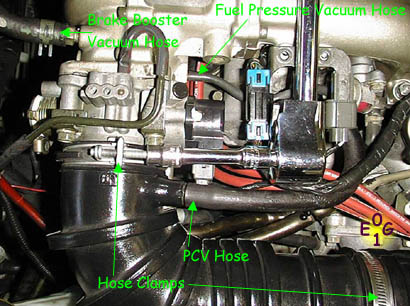
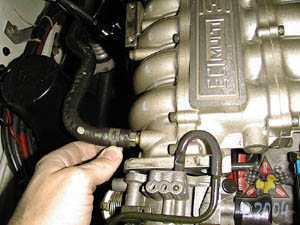
Disconnect Fuel Pressure Vacuum Hose [All] And BPV Hose [Turbo only]
|
|
|
|
|
|
Remove the vacuum hose that goes to the fuel pressure regulator by
sliding the hose off of the protrusion on the intake plenum. As with
other hoses, if it is stuck, grasp the hose near the end and carefully
twist it about the protrusion so as to break it free. It will then
slide off. Note that the Turbo models will have another vacuum line
that goes to the turbocharger bypass valve (BPV). That's the larger,
disconnected red hose in the upper middle of the 2nd picture.
|
|
|
|
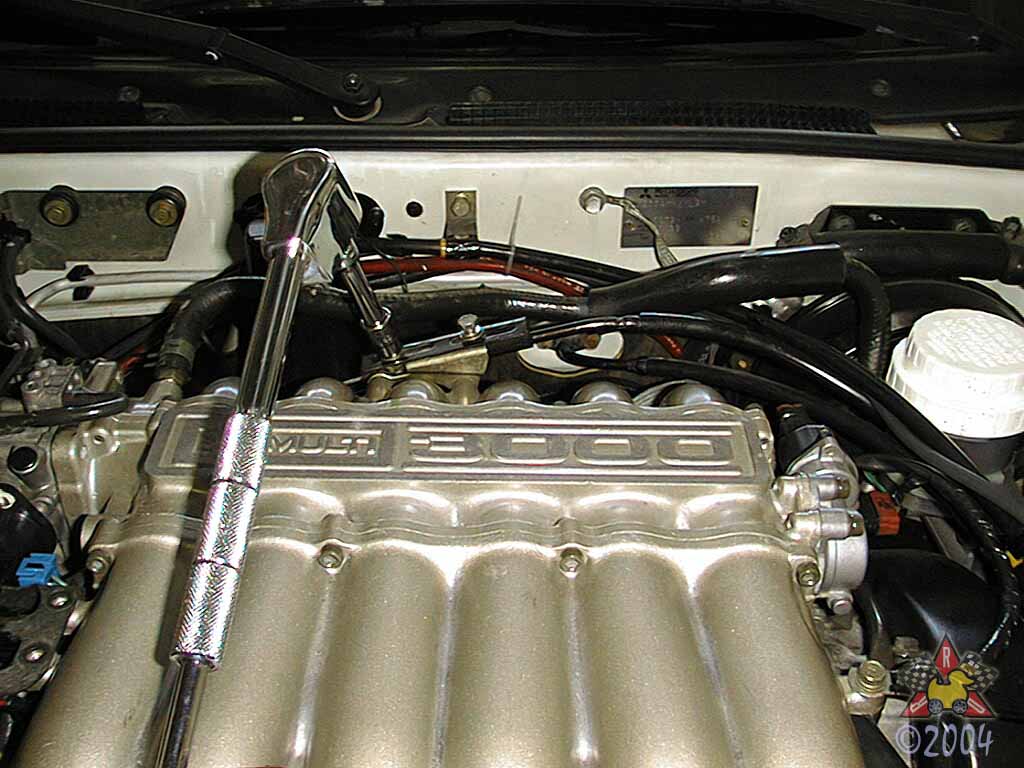
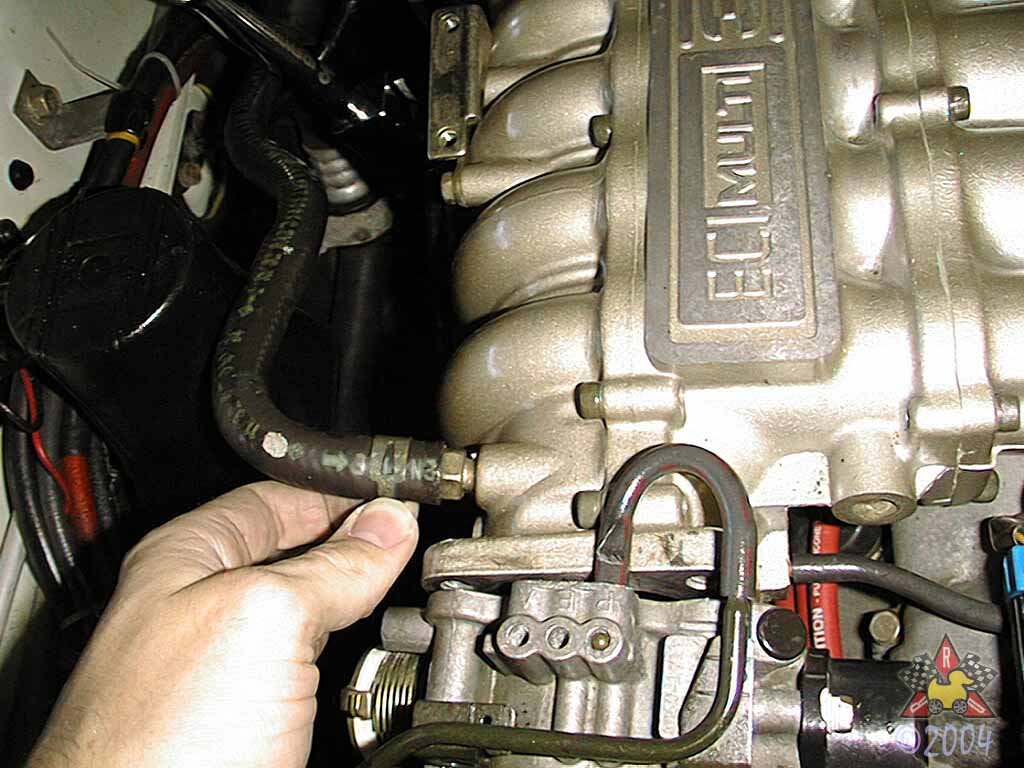
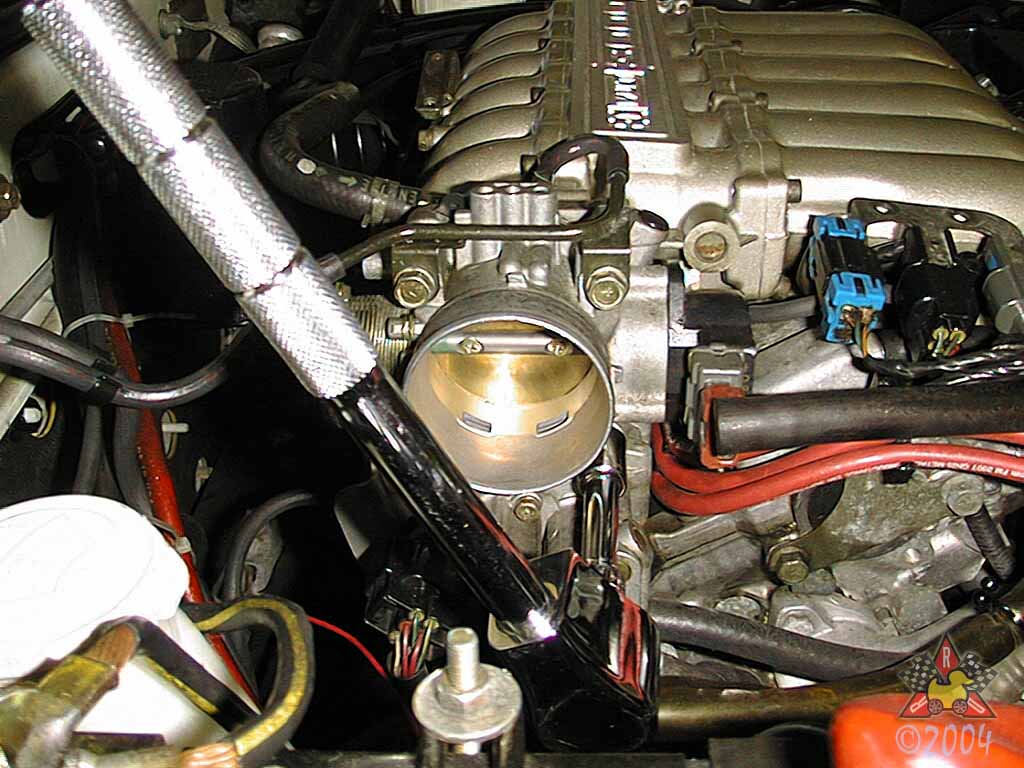
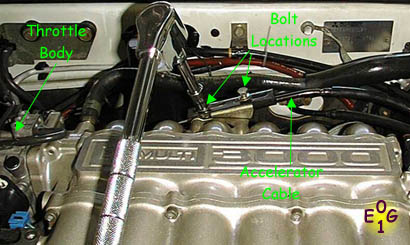
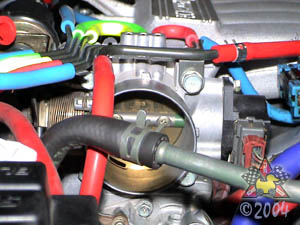
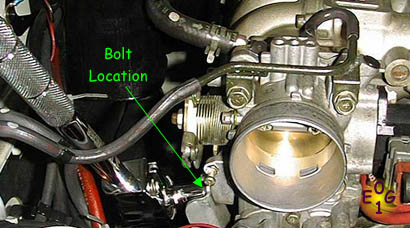
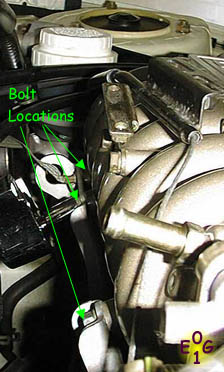
Remove the Throttle Body Stay Bolt
|
|
|
|
|
|
One 12mm (18 N*m) bolt secures the rear of the throttle body
to the engine. Remove the bolt. Pretty, shiny throttle body
courtesy Mopar Combustion Chamber Cleaner (Chrysler P/N 04318001).
|
|
|
|
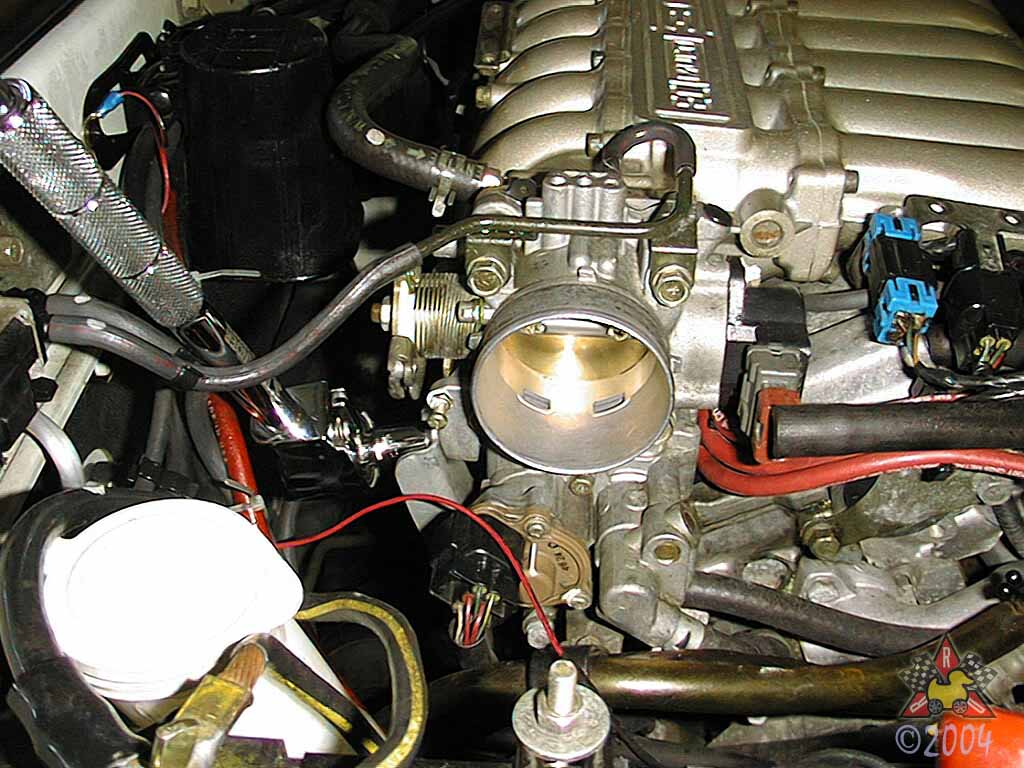
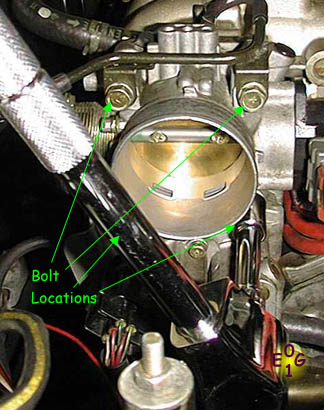
Remove the Throttle Body
|
|
|
|
|
|
Four 12mm bolts (13 N*m) attach the throttle body to the intake
plenum. Remove the bolts, and the throttle body will now be free from
the plenum and its mounting bolt. Gently pull the throttle body away from
the plenum, being careful not to lose the gasket (next step). Note that the
throttle body will still be attached to some coolant lines and some vacuum
lines, so do not attempt to remove the throttle body from the engine bay.
|
|
|
|
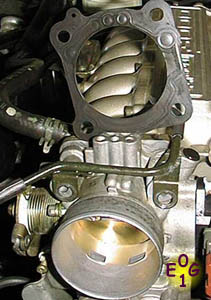
Remove the Throttle Body Gasket
|
|
|
|
|
|
The throttle body gasket is in between the throttle body and the intake
plenum. Remove it, making note of the direction in which it is installed.
Do not reinstall the used gasket - replace it with a new one!
|
|
|
|
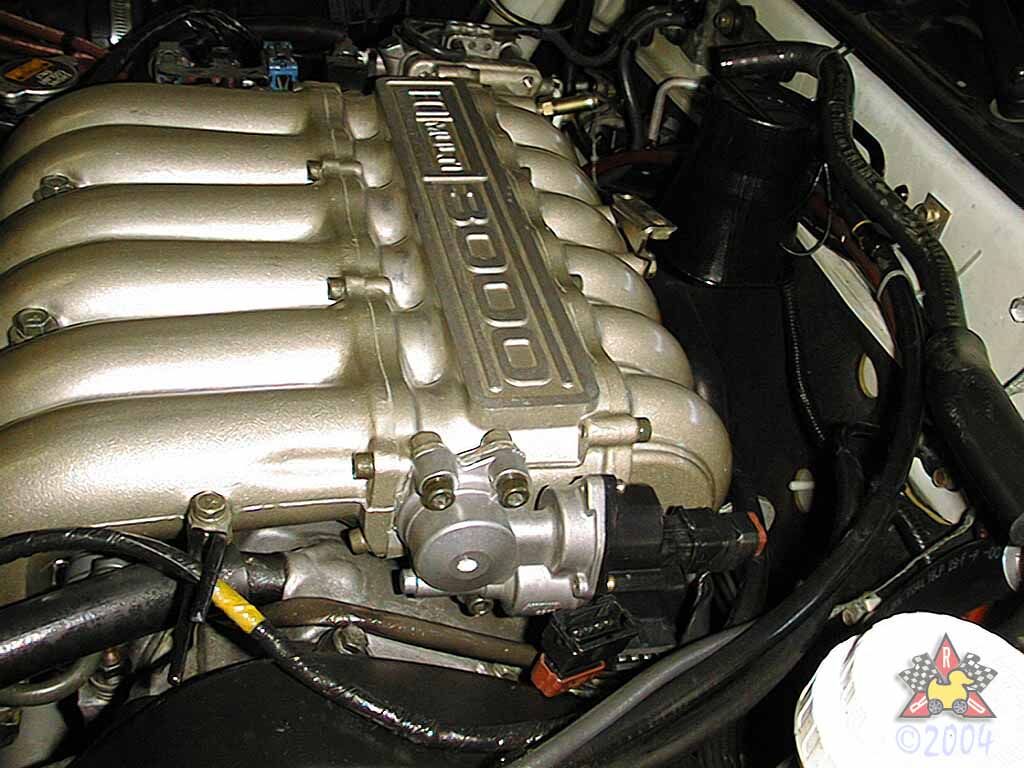
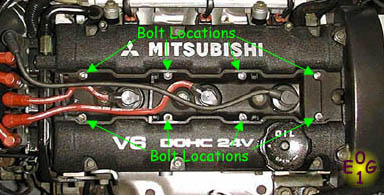
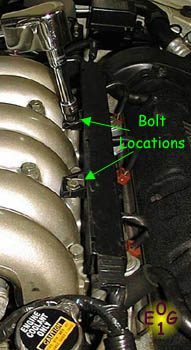
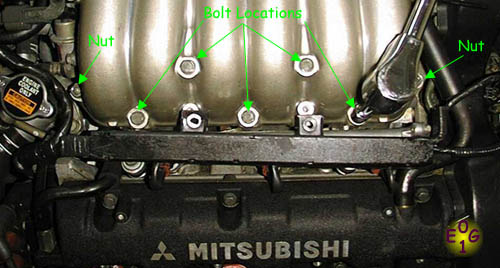
Remove the Intake Plenum Stay Bolts
|
|
|
|
|
|
There are three 12mm (18 N*m) bolts that secure the rear of the intake plenum
to the engine. Remove the bolts, noting that one bolt also secures a grounding
cable to the chassis.
|
|
|
Remove EGR Connections [If Applicable]
|
|
|
|
|
|
All Turbo cars, all OBD-II cars (1996 and later), and California-spec
Non-Turbo cars from 1991-1995 are equipped with an exhaust gas recirculation
(EGR) system. You'll need to disconnect the valve and the inlet pipe
on the rear of the plenum to remove the plenum from the car. There are two
12mm bolts on the EGR inlet pipe (foreground in 1st picture, right side in 2nd
picture) and two more 12mm bolts on the
EGR valve (farther back in 1st picture, left in 2nd picture). Note that the
second picture shows the plenum completely removed simply because it made
showing where the parts are much easier. Getting a camera in the space
above the rear turbo is difficult.
|
|
|
|
|
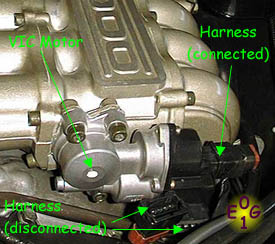
Remove the VIC Motor Wiring Harnessess [Non-Turbo Only]
|
|
|
|
|
|
There are two wiring harnesses attached to the Variable Induction Control(VIC) Motor.
There is a silver wire clip (looks like a paper clip) that surrounds the
harness connector. Carefully remove this with a small screwdriver. Then the harness
connector will just slide off.
|
|
|
|
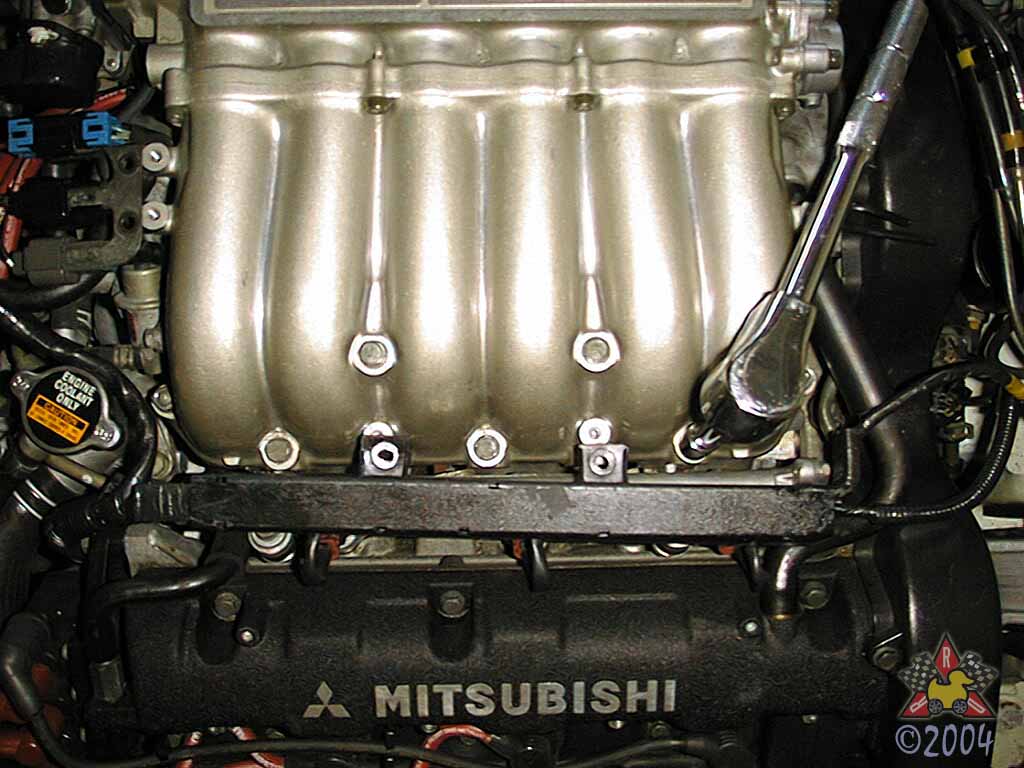
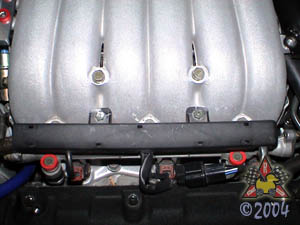
Remove the Remaining Intake Plenum Bolts
|
|
|
|
|
|
There are five more 12mm bolts (18 N*m) and two 12mm nuts (18 N*m) that
attach the intake plenum to the intake manifold. Remove the bolts and the
nuts, being careful not to let the lock washers or the nuts fall down into
the murky depths of the engine bay, lest you never see them again.
|
|
|
|
Lift the Intake Plenum Out of the Engine Bay
|
|
|
|
|
|
At this point, the intake plenum is not connected to the engine, so you can
simply lift it out. Do this carefully, and lift straight up until you clear
the posts on the manifold. The picture shows the plenum partially lifted out,
but not removed. You can also see the metal plenum-manifold gasket on top
of the intake manifold.
|
|
|
|
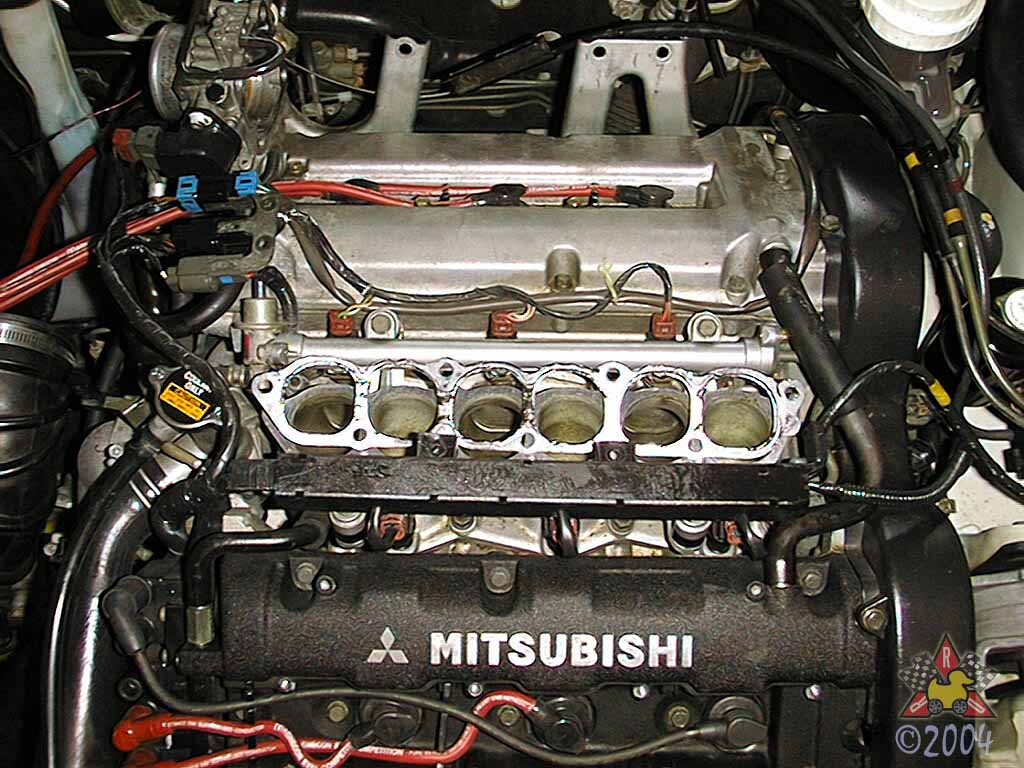
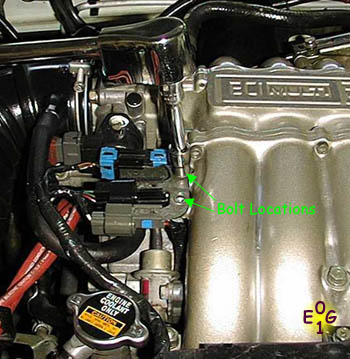
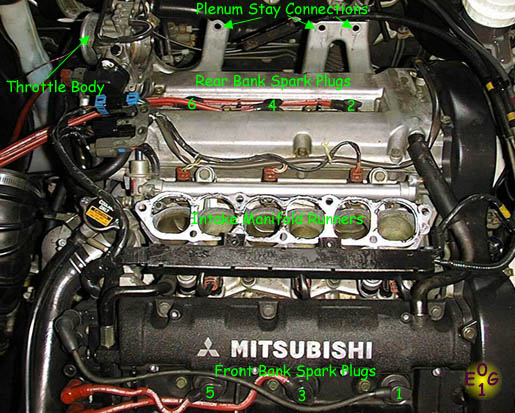
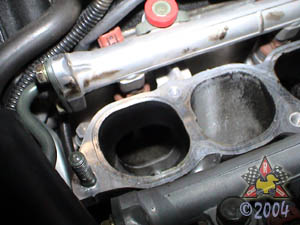
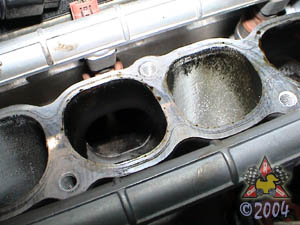
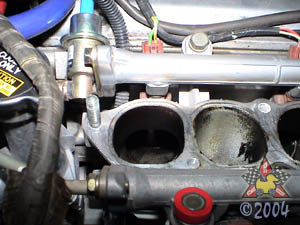
Remove the Intake Plenum Gasket
|
|
|
|
|
|
The intake plenum gasket lies between the manifold and the plenum and can
be removed once the plenum is removed. This gasket must be replaced
whenever the intake plenum is removed, as should all such gaskets. You now
have access to all 6 spark plugs and wires. A few points of interest and
the cylinder numbers have been labeled for reference.
|
|
|
|
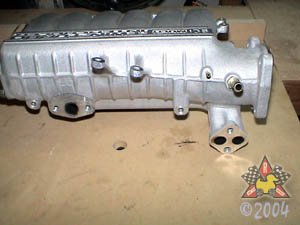
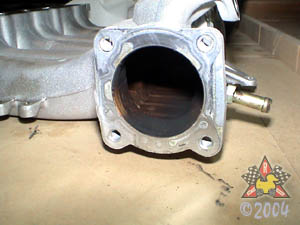
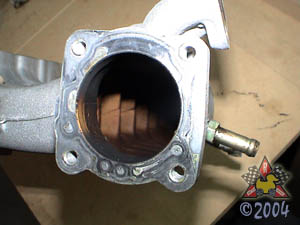
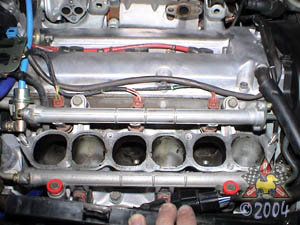
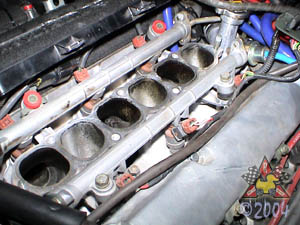
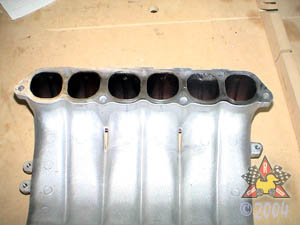
Random Pictures of Manifold and Plenum [Turbo]
|
|
|

|
|
|
These are pictures of a TT engine in good health with about 60,000miles
on the clock. Water injection was installed about a week before
these pictures were taken, and you can already see that the intake
runners are getting cleaned out from the water.
|
|
|
|
|
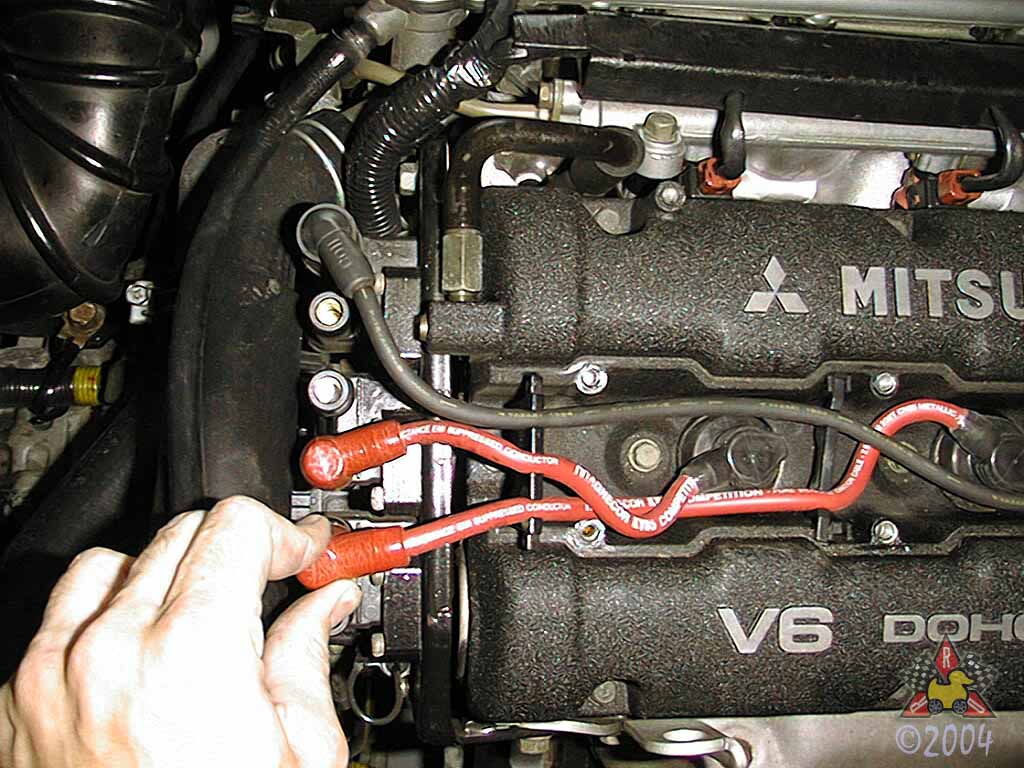
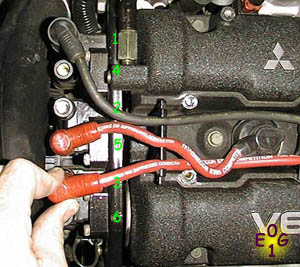
Remove the Coil-side Connections of the Ignition Wires
|
|
|
|
|
|
Gently pull straight up. Repeat for remaining 5 cylinders. Note that the numbers
are actually printed on the engine approximately where the green numbers are located.
From the front of the car, the connections are: 6, 3, 5, 2, 4, 1
|
|
|
|
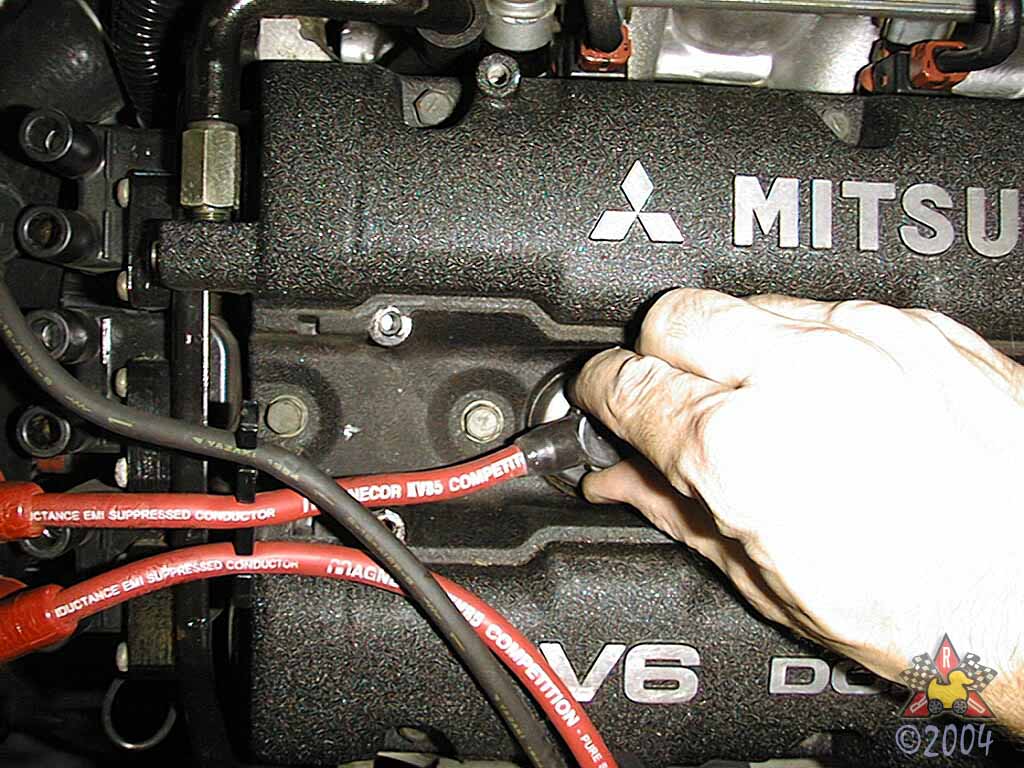
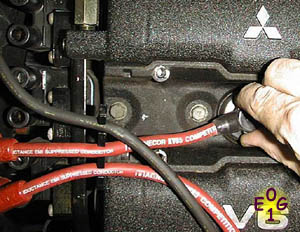
Remove the Plug-side Connections of the Ignition Wires
|
|
|
|
|
|
Again, gently pull straight up; repeat for remaining 5 cylinders.
|
|
|
|
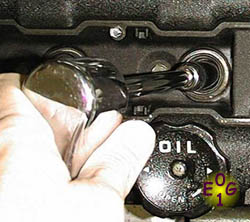
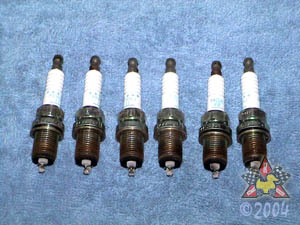
Remove Spark Plugs
|
|
|
|
|
|
With your spark plug socket on a 6" extension attached to your socket wrench,
gently remove the spark plugs from the spark plug wells. As you remove the
spark plugs, place them somewhere where you can later remember which plug
came from which cylinder as this can help diagnose problems. When replacing
the spark plugs, tighten them to 25 N*m with your torque wrench so you don't
strip the threads!
|
|
|
|
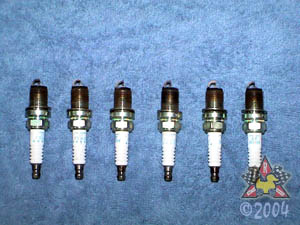
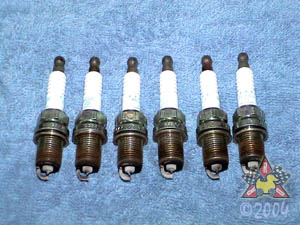
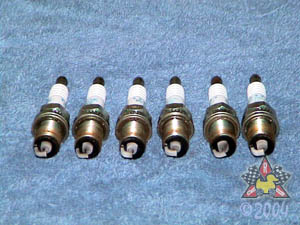
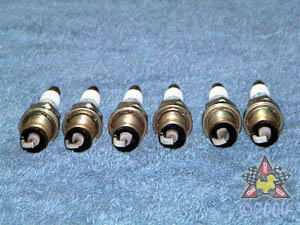
Inspect Spark Plugs
|
|
|

|
|
|
These plugs had about 10,000 miles on them and came out of a healthy turbo engine.
|
|
|
|
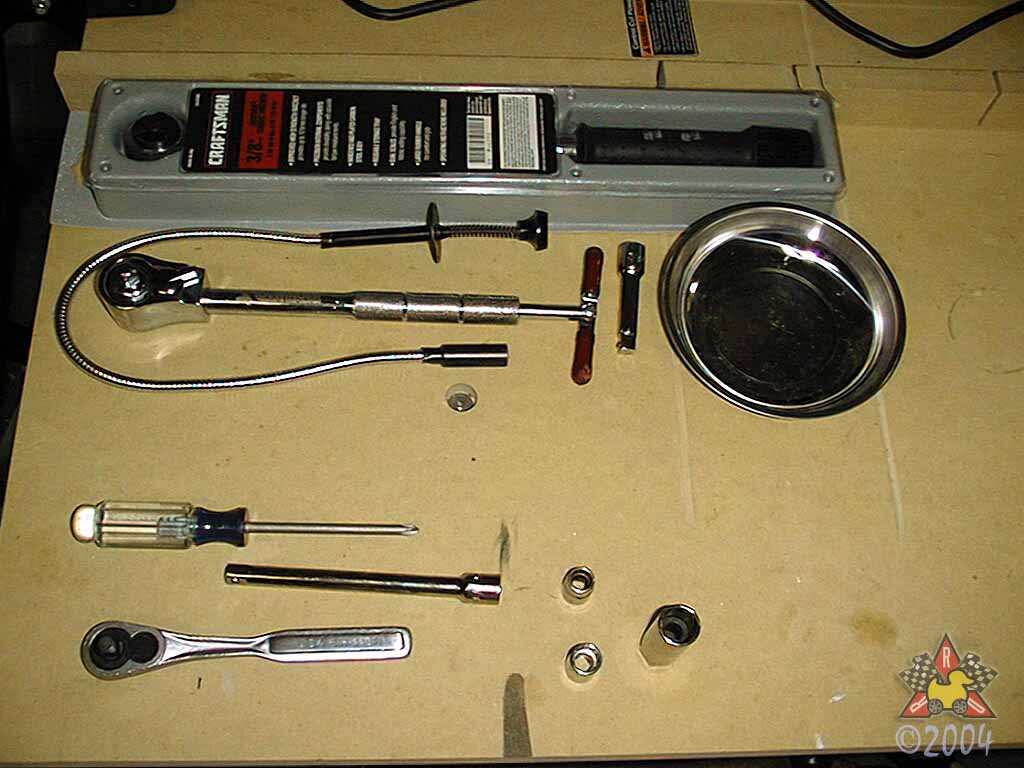
Reverse the Instructions to Reinstall Everything
|
|
|
|
|
|
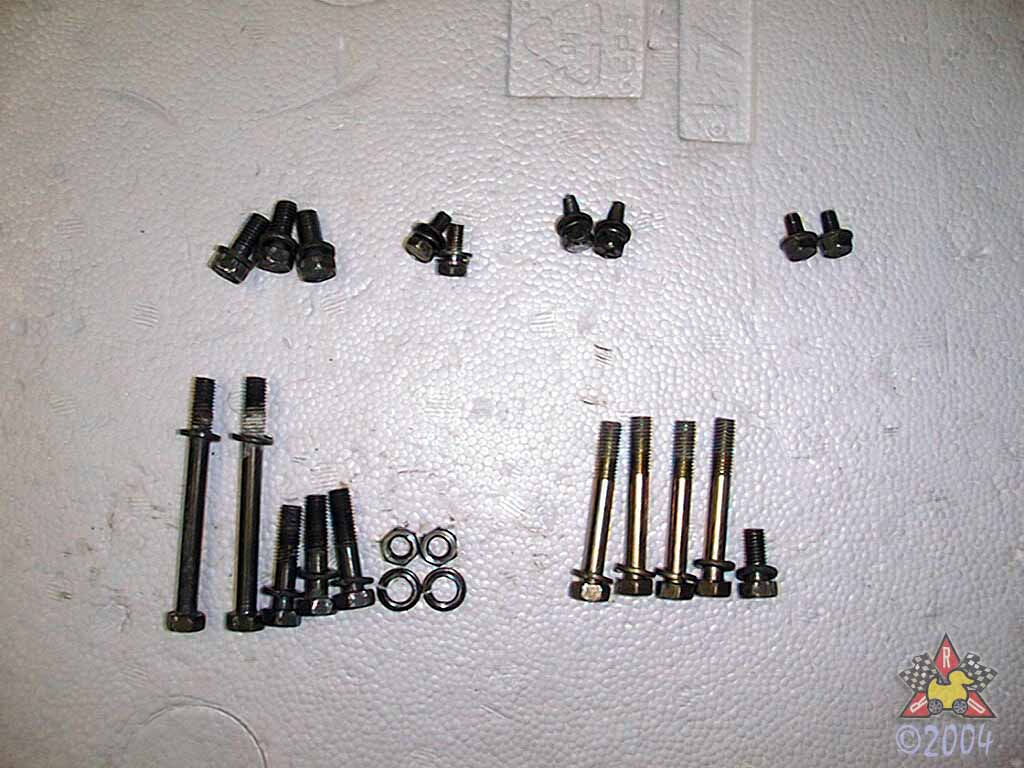
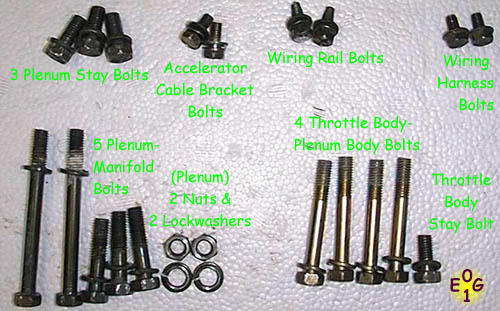
In case you forget where all the nuts and bolts you removed are supposed
to go, here's a picture of all the parts you should have lying around if you're
working on a Non-Turbo car without EGR. I've
included the torque specifications in the above descriptions for each of the
bolts you will be tightening. While it is not absolutely necessary to use a
torque wrench, it is highly recommended, especially on the connections
involving metal gaskets. If you have a car with EGR connections, don't forget
the (4) extra 12mm bolts you'll have, and if you have a turbo car, don't forget
the two extra 12mm bolts for the rear turbo compressor outlet pipe.
[Clockwise from top left]
- Intake Plenum Stay Bolts (With Washers)
- Accelerator Cable Bracket Bolts (With Washers)
- Wiring Rail Bolts (With Washers)
- Wiring Harness Bolts (No Washers)
- Throttle Body Bolts and TB Stay Bolt (With Washers)
- Intake Plenum Nuts and Lock Washers (With Washers)
- Intake Plenum Bolts (With Washers)
- Intake Plenum (not pictured)
|