|
Raise and Support Front of Car
|
|
|

|
|
|
I used a floor jack to raise each side of the car from the sturdy location
directly inboard of the emergency jacking points. I then used jack
stands to support the car while I was under it. NEVER, NEVER get under
a car that is not securely supported. Using only a floor jack is not
considered securely supported.
[Update] On my second time doing this, I grabbed
a set of ramps from a local auto parts store, and this made raising
and supporting the car much easier. My Mazda3 (stock suspension) has
about 7" of ground clearance at the front bumper cover, and the bumper cover
extends about 20" in front of the wheel. Thus, as long as the ramps are no higher
than 7" or do not reach 7" in height within the first 20" of length,
they should work.
|
|
|
|
Remove Undercover Trim Clips
|
|
|


|
|
|
Remove the clips by inserting a small flat-blade screwdriver
under the center section and popping it out. Remove the center
section and then remove the outer ring.
|
|
|
|
Remove Undertray Bolts
|
|
|


|
|
|
There are several 10mm bolts that fasten the plastic undertray
to the car. Remove these bolts so you can remove the undertray.
|
|
|
|
Unclip Undertray
|
|
|


|
|
|
Each side of the undertray has a clip near the wheel. Unclip the
undertray and it should be free of the car.
|
|
|
|
Remove Oil Drainplug
|
|
|


|
|
|
Remove the 17mm drainplug from the rear of the oil pan. Make sure
you have your collection container under the hole so that you can
catch the oil that will drain out.
|
|
|
|
Remove Oil Filler Cap
|
|
|


|
|
|
Remove the cap so that the oil will drain faster and more completely.
|
|
|
|
Remove Oil Filter Drain Plug
|
|
|


|
|
|
Using a 6mm Allen wrench, loosen the the drain plug so that you
can remove the lower portion of the canister without spilling
oil everywhere.
|
|
|
|
Loosen and Remove Lower Lid of Oil Filter Housing
|
|
|


|
|
|
You may be able to do it with your hands, but if not, you can use
a strap-type wrench or the "special tool" from Mazda.
|
|
|
|
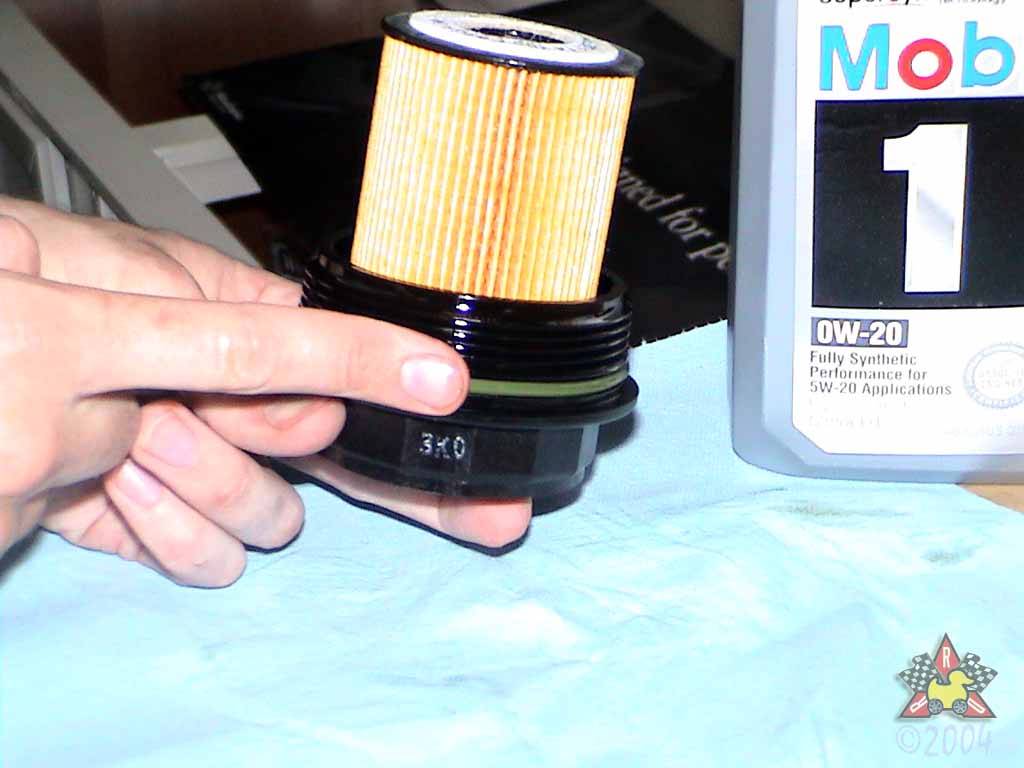
Remove Filter Element
|
|
|


|
|
|
The filter element just slides out of the housing.
|
|
|
|
Install New Filter Element
|
|
|


|
|
|
Just slide it on like the old one came off.
|
|
|
|
Remove Rubber O-Ring
|
|
|


|
|
|
Remove the large O-ring from the lower filter housing lid. You may need
to use a pick or hook as it's kinda slippery.
|
|
|
|
Install New O-Ring
|
|
|


|
|
|
The O-ring is necessary to properly seal the oil filter housing.
|
|
|
|
Replace Drain Plug O-Ring
|
|
|


|
|
|
The small O-ring on the drain plug needs to be replaced as well. Again,
you can use a pick or hook if your fingers get too slippery.
|
|
|
|
Install Drain Plug
|
|
|


|
|
|
Thread the drainplug into the plastic lid and make sure it's
tight. Be careful not to over-tighten it because the lid
is plastic and the drainplug is metal. The writing on the
oil filter housing lid says that the tightening torque is
10N*m +/- 1N*m (7.5ft*lbs to 8.5ft*lbs). You can put a 6mm
allen socket on your torque
wrench to tighten the drainplug properly.
|
|
|
|
Lubricate O-Ring
|
|
|

|
|
|
Wipe a little oil along the outer surface of the large O-ring
on the lower lid of the oil filter housing. This will help ensure that
the O-ring does not catch and tear while you reinstall the filter element.
|
|
|
|
Reinstall Filter Element and Lower Housing
|
|
|

|
|
|
Thread it on and make sure it's not cross threaded - you don't want oil leaks!
The writing on the oil filter housing lid says that the tightening torque
for the lid is 30-35N*m (22-25 ft*lbs), and you can measure this by putting the Mazda
special tool on your torque wrench for the final tightening.
|
|
|
|
Reinstall Oil Drain Plug
|
|
|

|
|
|
After installing a new crush washer, thread the plug back
into the oil pan and make sure it's snug. I don't have the
official torque spec for this drainplug, but the 17mm drainplugs
that thread into aluminum casings (like the Mazda3's oil pan)
on my other car are typically tightened to 18-22 ft*lbs.
|
|
|
|
Remove Upper Engine Cover [optional]
|
|
|

|
|
|
If you tend to be a klutz, you might want to remove the upper
engine cover so you don't spill oil everywhere.
|
|
|
|
Fill Oil
|
|
|


|
|
|
Refill the crankcase oil through the filler hole. It should take about 4.5
quarts if you're replacing the oil filter at the same time. Mazda recommends
5W20 oil in the Mazda3, and Mobil makes a synthetic 0W20 oil that meets these
requirements.
|
|
|
|
Replace Oil Filler Cap
|
|
|

|
|
|
|
Replace Upper Engine Cover
|
|
|

|
|
|
|
Start And Run Engine
|
|
|
Run the engine for a minute or two, looking under the car for any leaks.
Stop the engine immediately if you find any leaks.
|
|
|
|
Check Oil Level
|
|
|
Allow the car to sit for 10 minutes or so. Then, check the
oil level via the dipstick and see what it reads. There
is about 0.75qt difference between the "Low" and the "Full" marks,
so add enough oil to get it to register close to the "Full"
mark without overfilling it.
|
|
|
|
Replace Engine Undercover
|
|
|
Replace it like you took it off.
|
|
|
|
Clean Up Your Mess
|
|
|
Clean up any oil that spilled during the process and dispose of
the oil containers. Take the used oil to your local parts store
or HazMat disposal site
and properly recycle it. Don't pour it in a hole in your
mother-in-law's back yard or the EPA
will become intimate with your bank account. Further, make
sure you take your old filter to the HazMat site and don't wrap
it in paper towels and hide it in your trash like your neighbor
does. Do the responsible thing and properly dispose of your used
oil and filters! And put your catalytic convertors back on, too ;-)
|